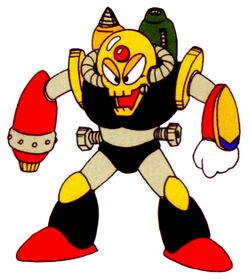
| Doc Robot Overloaded
|
|
|
|
| Artwork by Capcom
|
|
|
|
|
|
|
|
|

|
Doc Robot Overloaded is a boss from Make a Good Mega Man Level: Episode Zero, appearing at the end of Abandoned Lab. It is an old but durable Doc Robot model with the program data and weapons of multiple Robot Masters, left to rot in one of Dr. Wily's old Wily Castles.
Battle
Throughout the fight, holographic mugshots in the background indicate what Robot Masters Doc Robot Overloaded is currently copying. At first, Doc Robot Overloaded jumps while shooting two of Centaur Man's spreadshot bullets against the wall, before launching multiple Crash Bombs from its back. The Crash Bombs themselves do no damage, but they cover the entire floor and explode after a short delay. After repeating this attack once, Doc Robot Overloaded throws a large sawblade that crawls along the ground before bouncing back. A Mag Fly on the top of the screen lifts it up as it sings like Splash Woman, summoning small drones resembling Him. Once it reaches the top, it throws a series of Metal Blades at Zero before dropping back down.
After taking enough damage, Doc Robot Overloaded loses its arms and back cannons, before jumping in the air and creating a clone using Komuso Man's Doppel Attack. This clone is completely invincible and is distinguished by being bright orange, but the real Doc Robot now takes double damage. Both Doc Robots then fire two small Gemini Lasers each, which bounce around the room while they jump. Once the lasers go offscreen, they run back and forth like Crash Man and Gemini Man, only jumping when the fire button is pressed. At this stage, the real Doc Robot will create a grey Plant Barrier that boomerangs back to him like Cut Man's Rolling Cutter.
Once reduced to a single healthbar, Doc Robot Overloaded's head and clone are destroyed, while the body starts sparking and exploding. At this point, it is completely invincible and starts mimicking Quick Man's movement patterns, jumping three times at random heights before running straight ahead. However, it doesn't use the Quick Boomerang, and its health slowly depletes itself as the fight progresses, making it a matter of survival. Once its health reaches a certain amount, it will freeze in place as its body becomes more unstable, before eventually self-destructing.
Damage Table
Phase 1
|
|

|

|

|

|

|
1
|
2
|
1
|
7
|

|
1
|
2.5
|
2
|
2.5
|

|
1
|
2
|
1
|
2
|

|
1
|
2
|
2
|
5
|

|
1
|
3
|
1
|
2
|

|
1
|
2
|
2
|
2
|
| Other Notes
|
|
Phase 2
|
|
|
|
|
|
|
|
2
|
4
|
2
|
14
|
|
|
2
|
5
|
4
|
5
|
|
|
2
|
4
|
2
|
4
|
|
|
2
|
4
|
4
|
10
|
|
|
2
|
6
|
2
|
4
|
|
|
2
|
4
|
4
|
4
|
| Other Notes
|
|
Phase 3
|
|
|
|
|
|
|
|
0
|
0
|
0
|
0
|
|
|
0
|
0
|
0
|
0
|
|
|
0
|
0
|
0
|
0
|
|
|
0
|
0
|
0
|
0
|
|
|
0
|
0
|
0
|
0
|
|
|
0
|
0
|
0
|
0
|
| Other Notes
|
|
Trivia
